Great. I’ll try to catch up with you there tomorrow.
I’m planning to be at the makerspace around 1:00 or 1:30.
1 Like
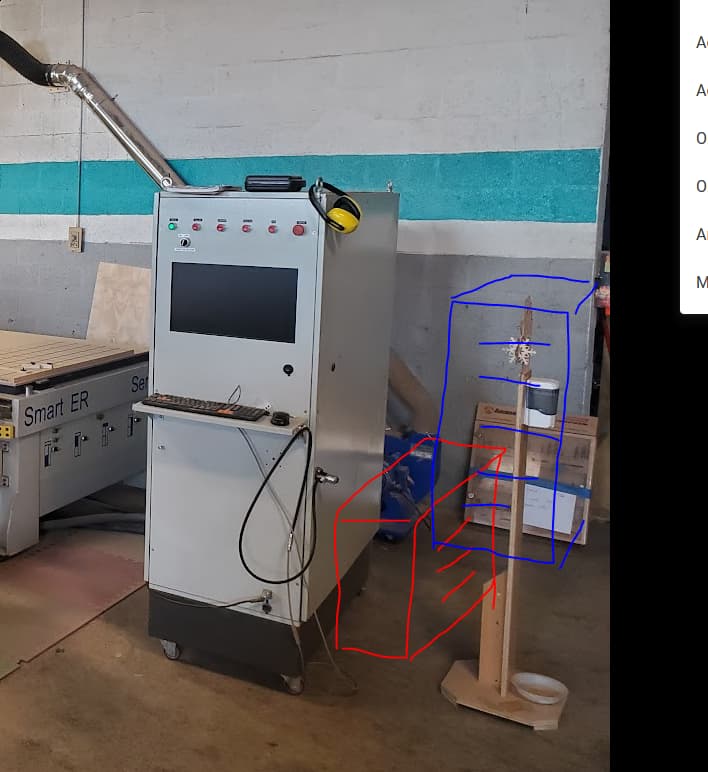
I built a sort of rack for the pumps and air dryer which could be enclosed in the future for noise control (would require forced air ventilation for cooling) and to make some more space for a dust collector. The only thing I didn’t have on hand was another piece of plywood for the top which is 38"x41" if anybody has some to donate.
I will be on shift tomorrow 12-2:30 and will try to place the pumps in position if some extra hands are willing to help. They weight over 300lb each, so they will have to be moved with the engine hoist, pry bar etc. The first one just sits on the ground, and then the lower shelf will go over it and the other pump can sit on that. Then they can be connected in the junction box which also needs to mount on the wall. Here is a high fidelity rendering:

Speaking of dust collection, I think we have a rough plan now to put the new cyclone where the mortising machine is now behind the panel saw. The 8in ducting would reach the main woodworking area from there. One thing that we will likely need for connecting the CNC is some addition 6in dust hose or possible some 6in rigid ducting. The easiest thing would be to buy 20ft on Amazon but if anyone knows of a better deal on some hose or ducting let us know.
@RealCarlRaymond apparently there should be a PDF which explains some of the controller interface/functions specific to the machine on the windows desktop (unless it has been deleted or moved in the decade since new).
There has been a lot of progress recently, and I think we’re about ready to try turning the machine on tonight. It’s not ready to use, for sure, but we might be able to wake it up and make it move around a bit.
I want to go in small steps. This is what I want to try tonight:
- Cap off the vacuum pump power lines in the junction box for now
- Make sure the voltage into the control box looks good
- Put a clamp meter on the power line
- Hook up compressed air through the air drier/cleaner (blue box)
- Clear off the bed, and strap the loose yellow dust shroud so we can move the carriage without dragging it around
Then we can see what happens when we flip the switch. If it works, we can raise the carriage enough to attach the dust shroud.
I’ll be there between 6:30 - 7:00pm tonight, and anyone who’s interested is welcome to join me.
3 Likes
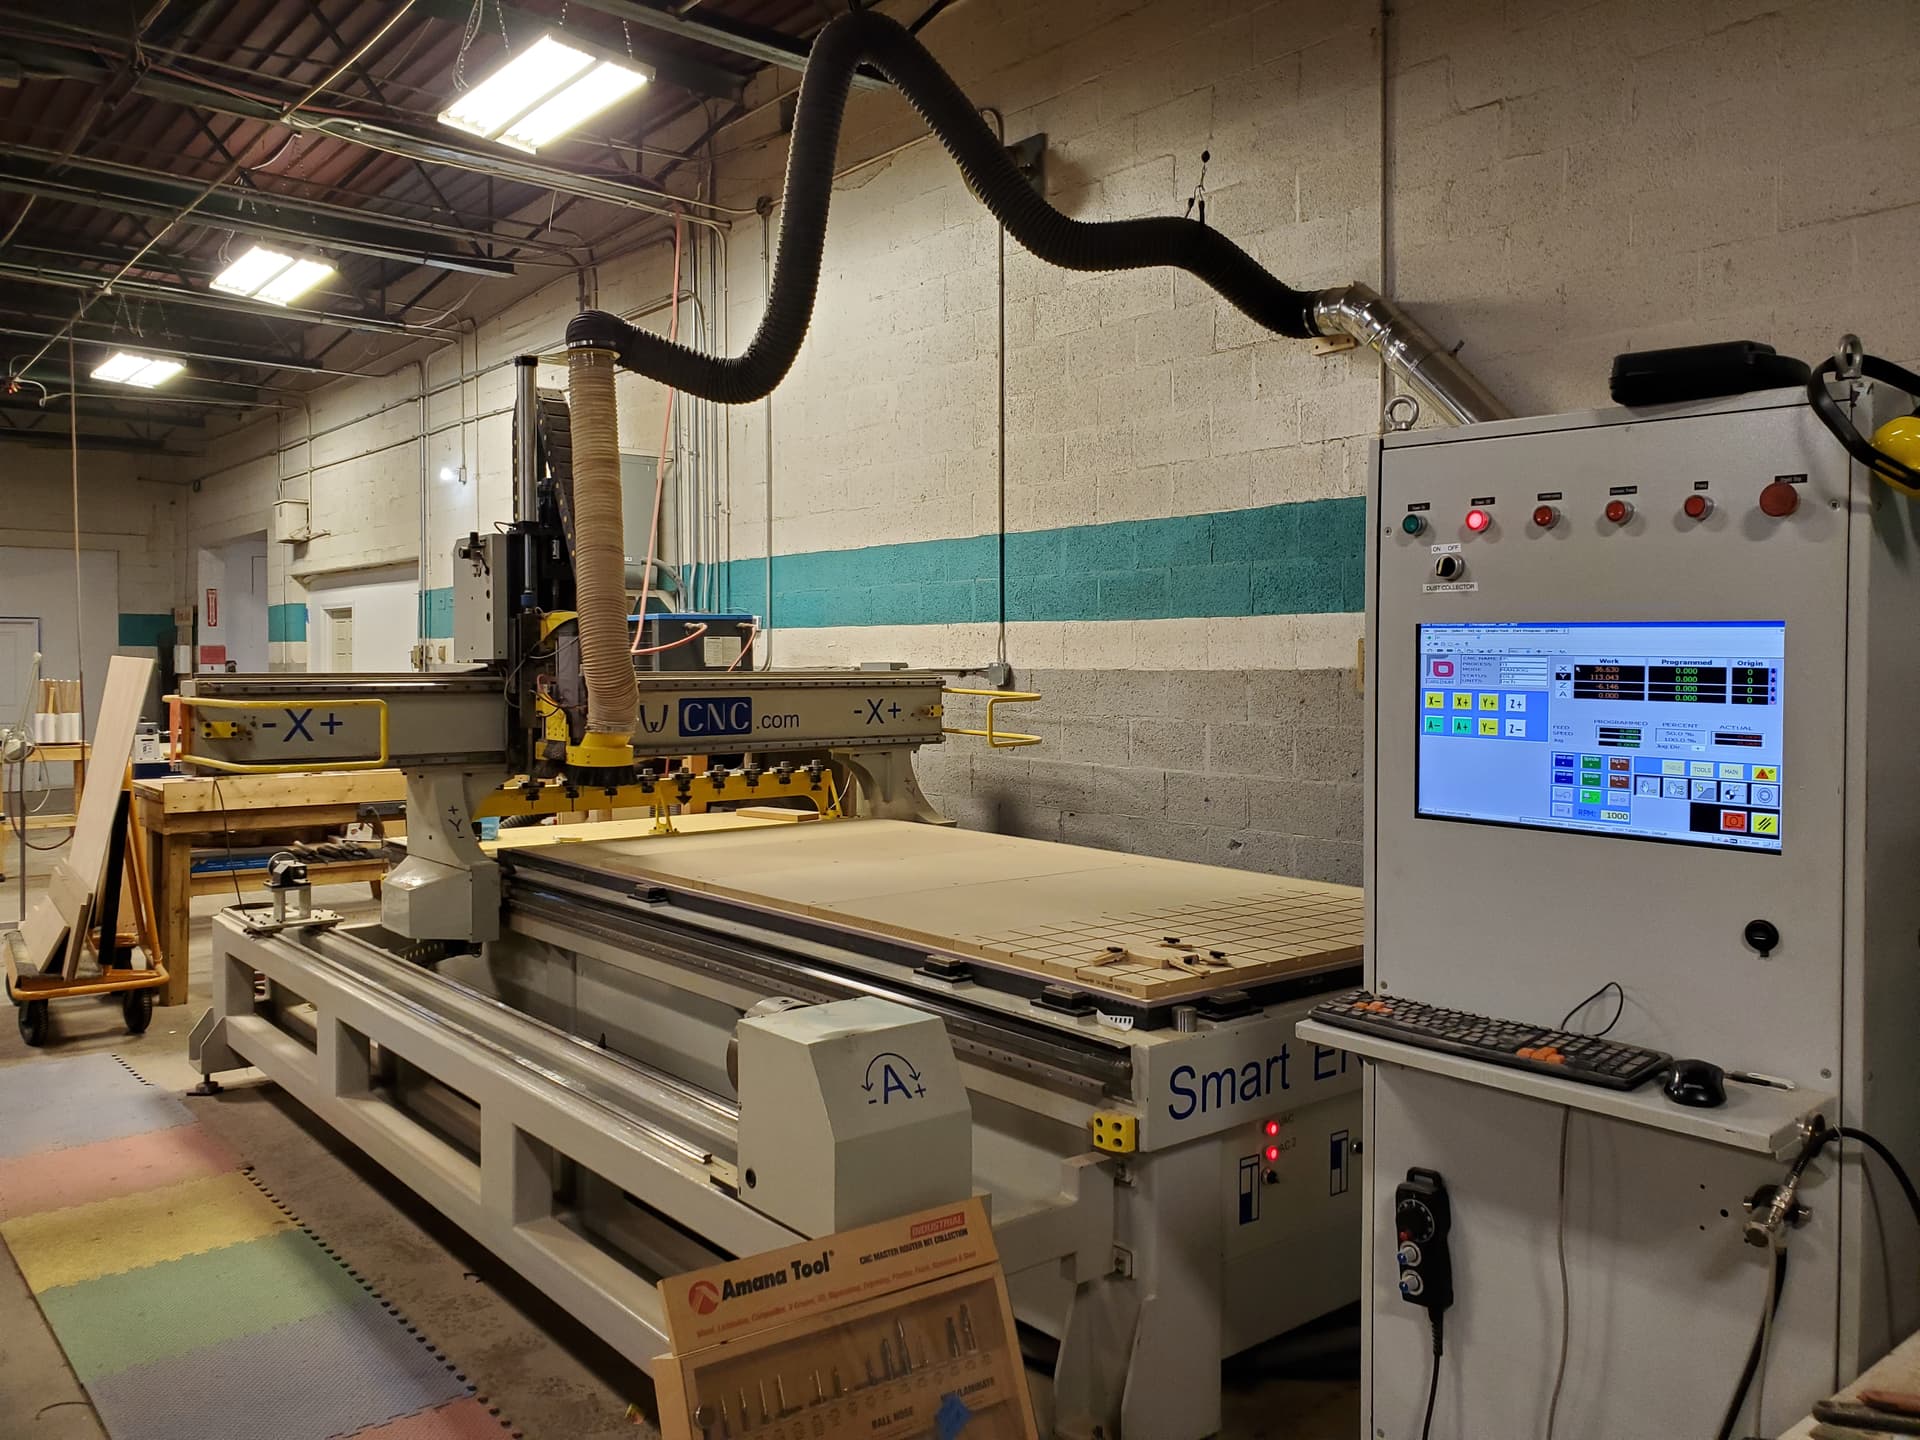
Everything went well last night, and we (@Bwil415 , @Jcard1415 ) got the machine moving and changing tools, and got the spindle turning. Everything seemed fine.
I confirmed that the yellow safety rails work. If they bump something, or vice-versa, the machine immediately stops and completely powers down. The red E-stop on the control box will stop the machine, but not power down. It didn’t appear to lose its position, either. I don’t know if that’s guaranteed all the time, though. It wasn’t moving fast when I hit it.
The automatic tool changer is really fun. It takes about 20 seconds, with no wrenches and no tool height setting necessary with a change.
I ran the spindle for about half an hour, slowly bringing the speed up to its maximum 24,000rpm. It was just a little warm, which is a big difference from the old spindle. It’s got a big fan built in, which is kind of loud for a fan.
The air drier (blue box) worked fine. It has a condensate tube where water drains, so we’ll need somewhere for that to go. A small evaporation pan should be enough. Last night there was no water coming out because the shop air is so dry right now.
I think we should add an on/off switch for it on the control box, like the one already there for dust collection. A solenoid air valve in between the drier and machine on the same switch will be nice. Without a valve, the machine will just bleed compressed air all the time.
One of the next tasks will be to start the vacuum pumps, and make sure the motors turn in the right direction. I don’t know how loud they are, but I expect they are at least somewhat loud.
The other detail is the dust collector. We need to locate it, and set up the ducts and hoses.
We also need to figure out holding down material when it’s not a large sheet. I know Blake has some ideas for a clamping table for small parts.
In parallel with the above, we can try creating a job with V-Carve, and run it “in the air” with no material. We can put in a lot of tool changes, just for fun.
4 Likes
I’ve made some nice progress with the machine over the last several days. I’m still flummoxed in some regards with the software, but I’m slowly figuring things out.
Compressed Air
Today I added a solenoid air valve on the compressed air line, so that we don’t have to manually connect and disconnect the air. Otherwise, if it’s connected, it just bleeds air all the time through the tool holder when it’s turned off.
Electrical
There’s a junction box mounted on the wall that connects the big vacuum pumps and some switched outlets to the control box. My plan for the outlets is that one will be powered automatically when the machine turns on. The air drier and the solenoid air valve will plug in there. The other outlet will be switched from the control box for the dust collector.
Suction
Today I turned on the vacuum pumps for the first time. Luckily they turned the right way the first time (there was a 50% chance they would turn the other way). They are loud for sure, but not crazy loud. I wondered if the wooden platforms might amplify the noise, but that doesn’t seem to be happening. We may still want some kind of sound baffle.
On the front of the bed there are some E-stop style switches for switching the suction zones on the bed. Some of them don’t seem to work, and look broken. They’ll need replacing. I did manage to get suction on the the right edge, but nowhere else. Interestingly, that zone’s switch has already been replaced. Maybe the manufacturer got a bad batch of E-stop switches.
Software
On the software side, we know how to change the tools, and how to touch off to get the Z-height. In V-carve, there was already a machine definition for a NewCNC Series II Smart ER, which was a nice surprise.
I created G-code for our checkout stool project, and tried to run it on the machine in the air – not actually cutting anything. I thought I figured out how to set a work offset position, but when it went to pick up the first tool, I think it hit the Y limit switch and shut down. (And it shuts all the way down to power off, so I just went home.) I was expecting it to use machine coordinates for tool changes, and the configured work offset for the toolpath.
Dust Collection
Still to be figured out is the dust collection. We’ll use the blue vacuum that’s currently on the edge sander. But we’ll need to suspend the ducts and hoses so that the carriage can reach all four corners on the bed. We broke one of the two cable retracting reels (just by looking at it, I swear), so we’ll need another, at least.
My mistake! They’re not electric switches for selecting the suction zones, they’re pneumatic switches.

Do we have a template to start writing SOPs? It might help to collect some of what we figure out with how to set offsets etc. I will be in Monday and more next week and plan to mess around with it.
I just successfully ran a test file from V-Carve on the machine. The spindle was in the air with no material, so I have no evidence of it, but it seemed to work just fine. It made the tool changes and everything. I feel like if I had used actual material, I would have a little stool now.
The secret is to follow the steps in the order they appear in the “Operating” section of the manual.
- Start machine and reference all axes
- Load the G-code (“Activate the part program”)
- Set the workpiece origin
- Set tool height for all tools in the job
- Run
Currently I had to enter G-code manually to pick up each tool and touch it off, but I think there’s a way to pick several tools and have it touch each off in turn.
Above I said the vacuum zone switches don’t work, but they do. You just have to press them harder than I was pressing them. The suction works in all of the zones, and we got a small piece of plywood to stick.
Since the current zone switches look just like E-stops, but are not, I ordered some new switches with a rotary actuator to replace them. I think that if it looks like an E-stop switch, it should act like one. I ordered from Ali Express, so it will take a few weeks for them to arrive.
2 Likes
I made a little trolley with bearings that rides on 1in conduit, and clamped a piece up in the rafters to hang the CNC dust Hose frome. I put it in a position that I think will work well enough. It could be bunching up too much when the machine is at the X+ limit and moves from Y- to Y+. I think a little more testing might be a warranted. Both mount on the wall and/or the conduit could be moved fairly easily if needed.
I see a couple next steps:
-
Make sure the flex hose is where we like it and then attach the rigid ducting to the wall to connect it down to the blue dust collector next to the control cabinet.
-
Contact Vectric and upgrade our VCarve seats to 11.5 (11.0 can no longer be installed on other PCs to use the makerspace code).
-
Start updating/writing the procedures and checkout.


2 Likes
Nice work on the hose support. I think that should work fine.
We have permission to move the dust collector from the edge sander over to the CNC machine. If it’s necessary, we could extend the controlled outlet for it down to that end of the machine, or just use an extension cord.
Got the dust collector moved and connected. The switch works. I did trip that breaker when I first tested it, but ran it many times after that with no issue. The suction seems adequate with the shoe lowered.
I also finished the spoilboard layout and @Lou helped me cut the panels for that. Since the dust collector is working, I was able to surface the whole vacuum board and get it super clean and flat.
I think the machine itself is basically ready now. It seems to be working great!

3 Likes
Excellent & exciting news…thank you for the update!!
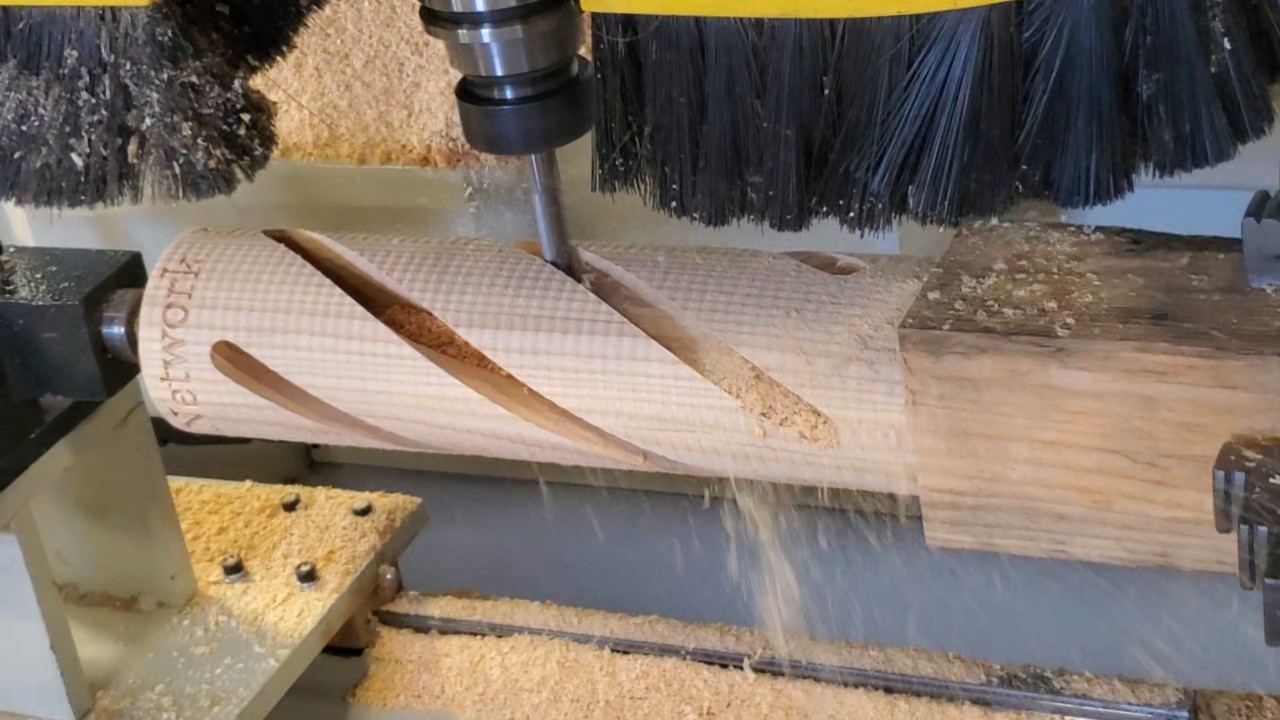
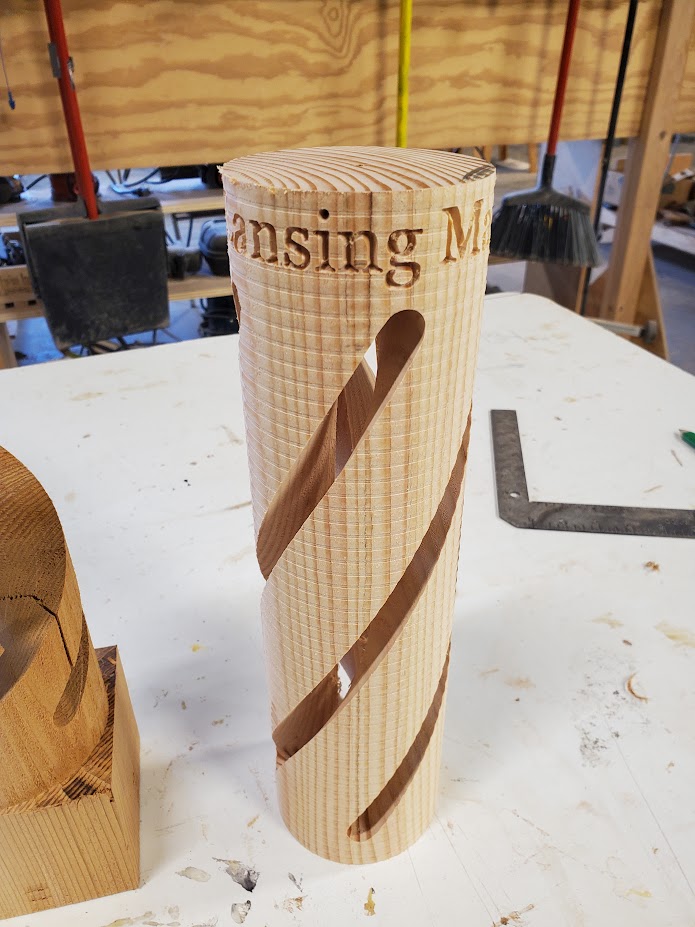
Ok, we’re nearly at the finish line. The last major part of the machine I wanted to test was the rotary axis, and it seems to work fine. See the pictures of the test piece below (and find it at the front desk this week).
A draft of the SOPs exist now on our Dozuki site. @Evelyn and I went through them today, and they seem adequate with a few tweaks.
Here’s a few more things we need or might want to do:
- Fix the air drier drain valve that keeps getting stuck open. I fixed it last week by disassembling and cleaning it out, but it got stuck open again today. I might try to more thoroughly clean and polish it before ordering a replacement for $20 from China.
- Grease all the bearings through the manifold on the Z axis.
- Get Vcarve set up with the post processors (and maybe tweak the code a bit for those). Hopefully we can get Vcarve updated to 11.5 as well as I have been unable to access the makerspace version from my own PC since they released the new version.
- Update Vcarve SOPs to better match the new machine? It would be great if someone could take this on.
- Confirm checkout process and SOPs.
To that last point, I would like to get some people to do a test checkout with me in a couple weeks. Preferably current @SpaceForce volunteers who were familiar with the previous machine. I will plan for Sunday 3/24 at 1pm, please reply below if you are interested in participating. I am only thinking 2 or 3 people to start.

4 Likes
Cool. I’ll be there for sure.
1 Like
I am not a volunteer but was checked out on the old CNC, would like to be part of the checkout of the new machine if possible on the 24th. if not that’s cool. i’ll wait for the next round. ping me if invited. Thank you.
Dude,
Thank you for all this hard work. I’m so impressed and excited by the progress of you and so many others working on this!!
1 Like
One more thing: I think we need a cabinet or toolbox of some kind for storing bits, collets, wrenches, vacuum gasket, etc. Maybe up against the wall, or next to the control cabinet. If anyone has a line on something like that or has an idea for storage, let us know.
1 Like
I’m impressed with the rotary job! Nice work.
I go to MSU Surplus almost every week, so I’ll keep an eye out for something suitable for storage. I agree we really need something there.
3 Likes